To be completely clear, if you don’t have your SHSH blobs on file for the iOS you want to downgrade to, you will not be able to downgrade. There is no way around that. This being said, here is how to downgrade iPhone iOS 4.2.1 to 4.1, 4.0.2, 4.0.1, or 4.0…
During the downgrade process, your iPhone contacts Apple’s servers to sign the firmware and make sure it can be downgraded. When a new firmware comes out, Apple signs the previous one for a few more days then stops, so technically, you can’t downgrade any longer.
The trick is to make your iPhone believe it is talking to Apple’s servers, while in fact it is talking to Saurik’s servers where your SHSH blobs are saved. That’s exactly what we’re going to do.
Downgrade iPhone 4.2.1 to 4.x
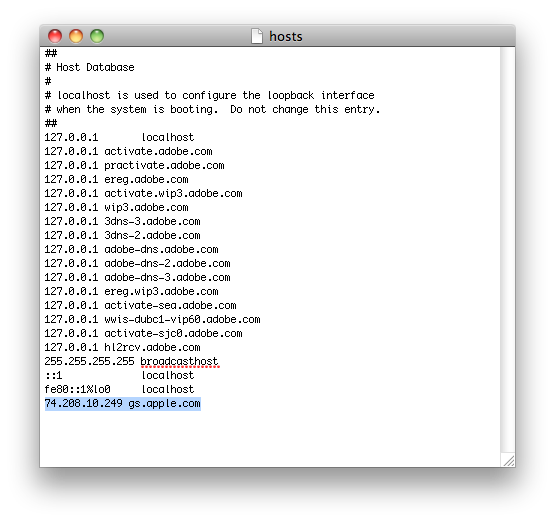
Step 1 for Windows: Make sure you are logged in with administrator privileges. Navigate to C:/Windows/System32/drivers/etc and open the filed name “hosts” with NotePad. Add the following at the very bottom of the file: 74.208.105.171 gs.apple.comSave the file in the same directory.
Step 1 for Mac: In Finder, go to Go > Go To Folder, and enter /etc. Search for the “hosts” file and right click on it to open with TextEdit. Add the following at the very bottom of the file: 74.208.105.171 gs.apple.com
Click Save As to save the edited file on your desktop. Name the file “hosts”, and make sure to uncheck the box that says “if no extension is provided, use .txt”. Now drag and drop this edited file to /etc.

Step 3: Put your iPhone in DFU mode. Launch iTunes and plug your iPhone in. Press and hold the home and and sleep button together for 10 seconds. After exactly 10 seconds, release the sleep button while still holding the home button. Keep holding the home button until iTunes tells you it has found an iPhone in recovery mode.
Step 4: Now hold the Option key (Mac only) or Shift key (Windows only) while clicking the Restore button in iTunes. A dialog box will pop up and you’ll be able to choose the firmware you want to downgrade to, downloaded in step 2.
Step 5: Your iPhone might throw some errors (ie. error 1004 or 1015). That’s ok. It’s normal so don’t freak out and just click “ok”.
Step 6: Your iPhone should now be stuck in recovery mode, showing the “connect to iTunes” logo. To get out of this, simply download and install TinyUmbrella, launch it, then click on”Exit Recovery”.


No comments :
Post a Comment